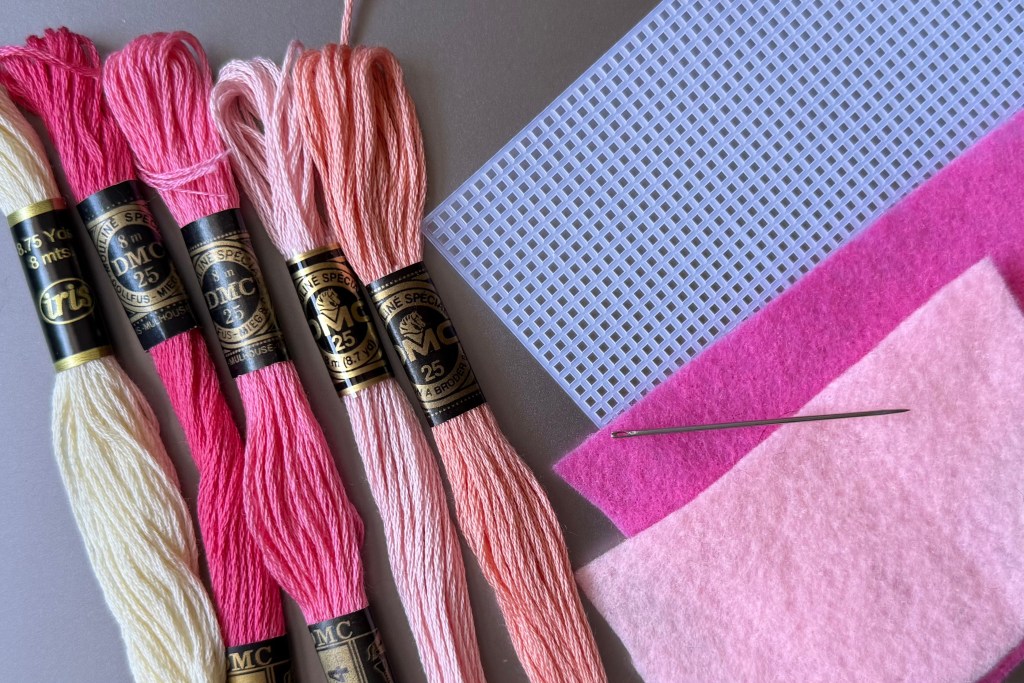
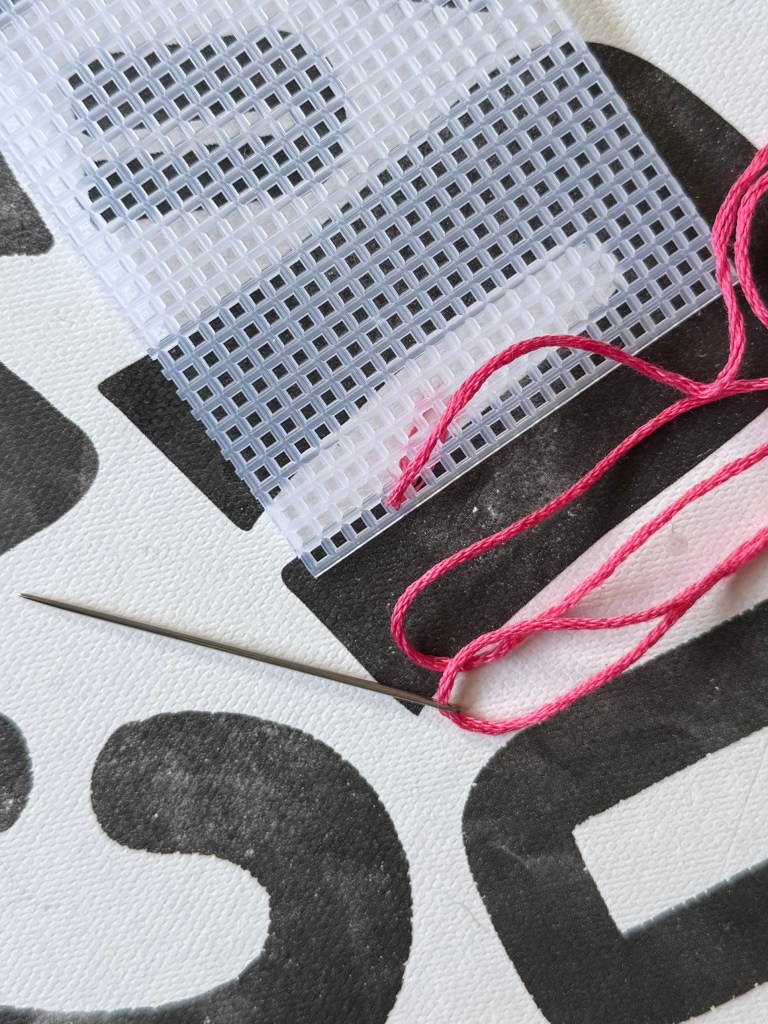
For this project you will need:
- plastic cross stitch canvas
- your favorite cross stitch needle
- dark pink thread
- pink thread
- light pink thread
- peachy thread
- white or cream thread
- light and dark pink felt (optional)
This past Christmas, I wanted to create a pink cow keychain as a gift. For some reason, I couldn’t find a pattern of a cow facing forward, so I had to start from scratch for this project.
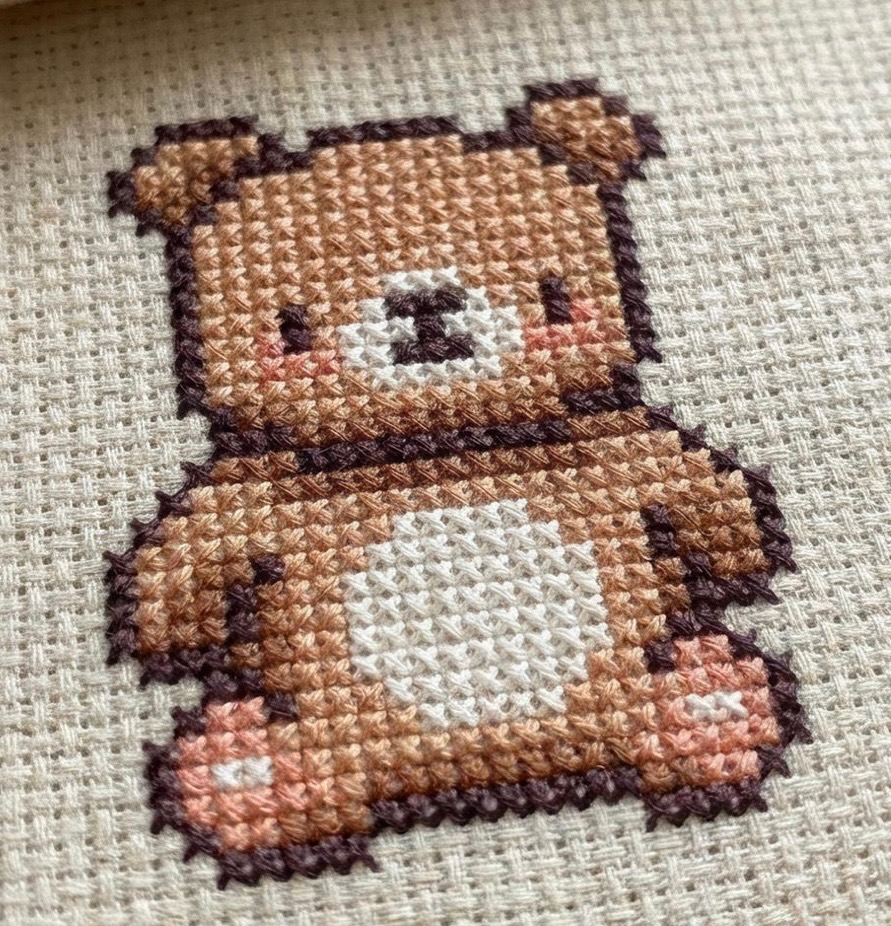
First, to create the design I had in my mind, I started on Pinterest for anything that looked close enough. I found this cross stitch teddy bear sitting up the way I wanted the cow to look, so I used it as my base.
To create any of my templates, I use the website StitchFiddle. On this website, you’re able to click “create a new chart” to open up the options of what type of template you’re looking to make. For this project, I chose “cross stitch” with “DMC” as the color palette. From here, it brings you to a screen where you can choose from a variety of starting points.
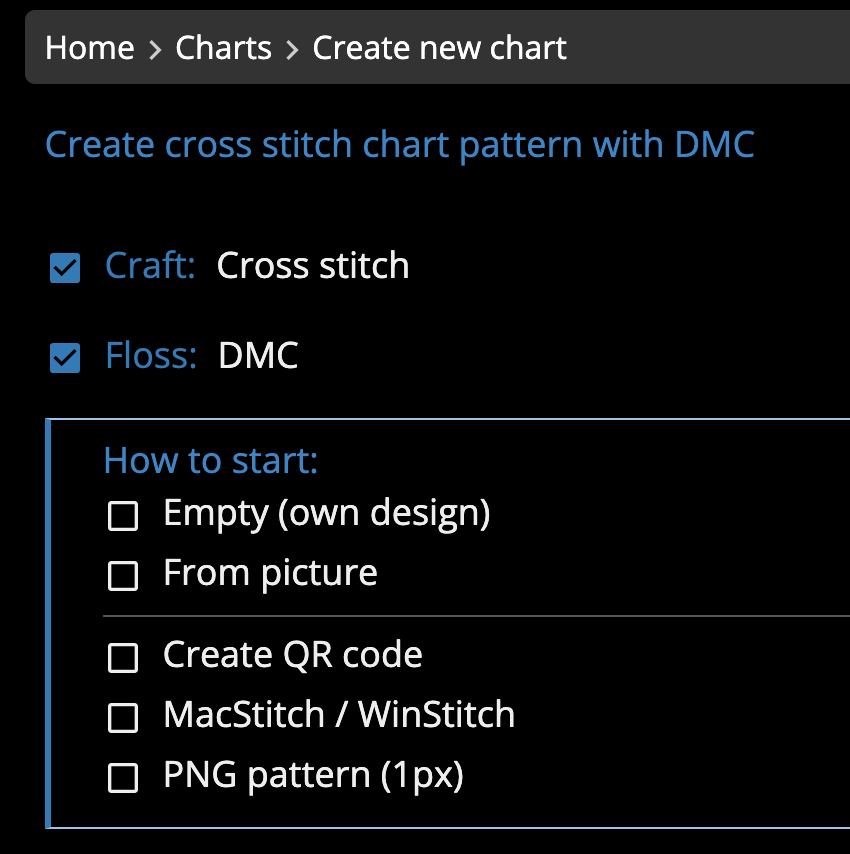
Since I’m referencing a finished product to make a base outline, and then making lots of changes, I chose “empty (own design)” in order to get a blank starting point.
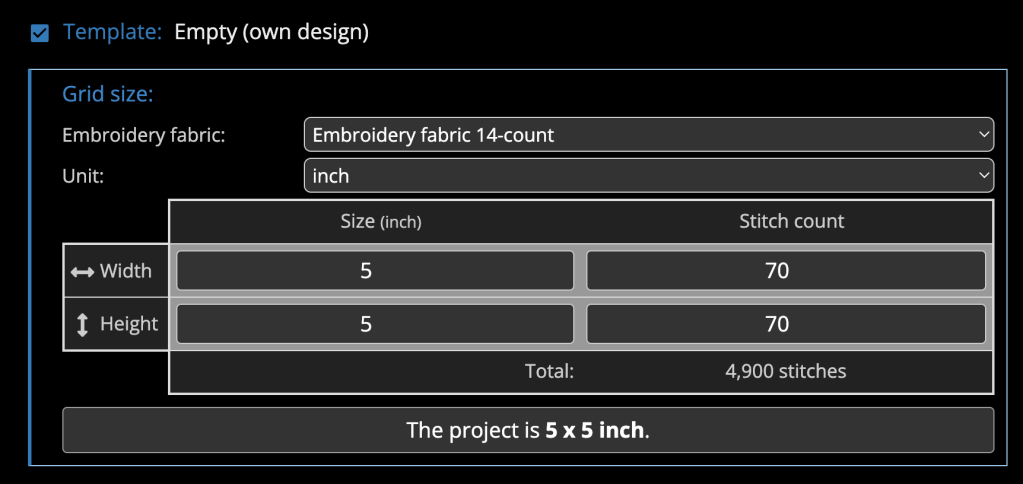
The final step is choosing the size of the blank chart (but, don’t worry, you can add and delete rows/columns at any point while you’re working)! For this cow project, I counted the stitches on the bear to get a rough idea of how large it would be. It was around 25 wide and 30 tall, so I set my blank template to be 30 wide and 40 tall for some extra buffer space.
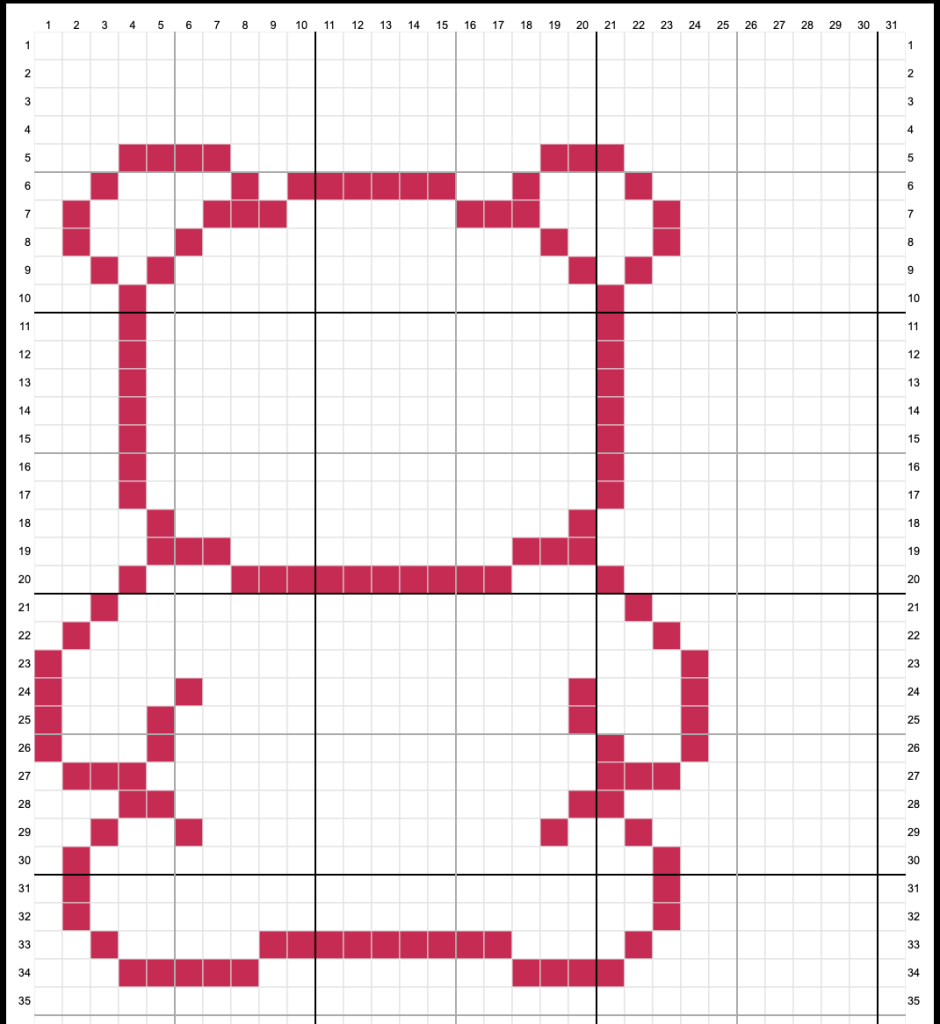
I began first by transferring the bear to the space here using a dark pink color. To add a new color to your template workspace, or change one of the pre-loaded colors, you can choose the palette icon or add the +1 button to open a chart of all available DMC thread colors to add.
I chose a dark pink to add my palette, transferred the bear, and started my adjustments to make it look more like a cow.

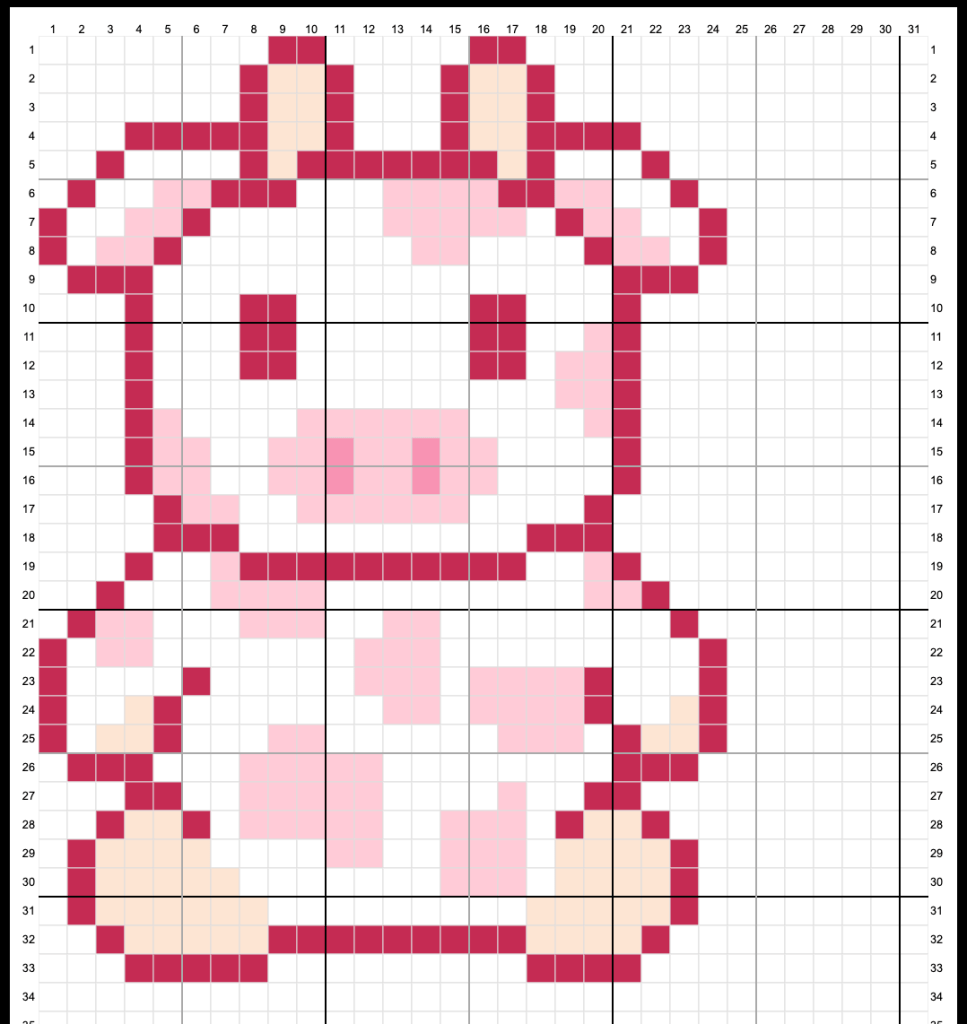
Now that the base template is more cow shaped, it’s time to fill in the colors. I used the existing light pink option, and added a slightly darker pink as well as a light peach color.
I always take a screenshot or photo of my template just in case my laptop sabotages me and erases my work for any weird reason (you never know!!).. then, it’s crafting time.
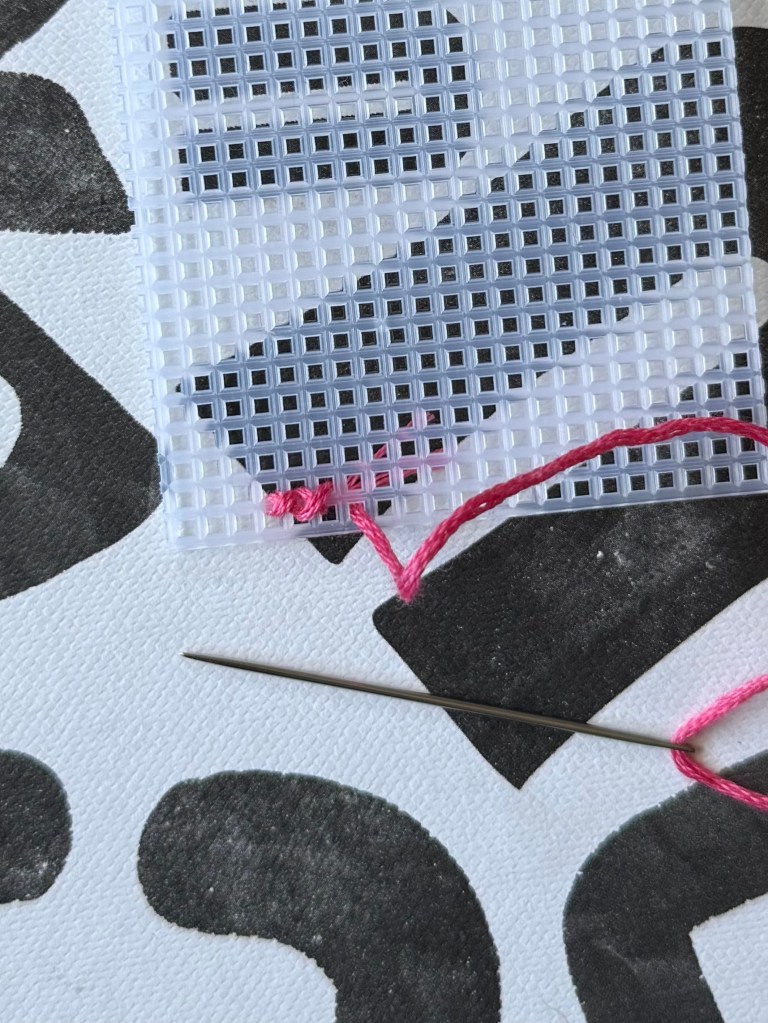
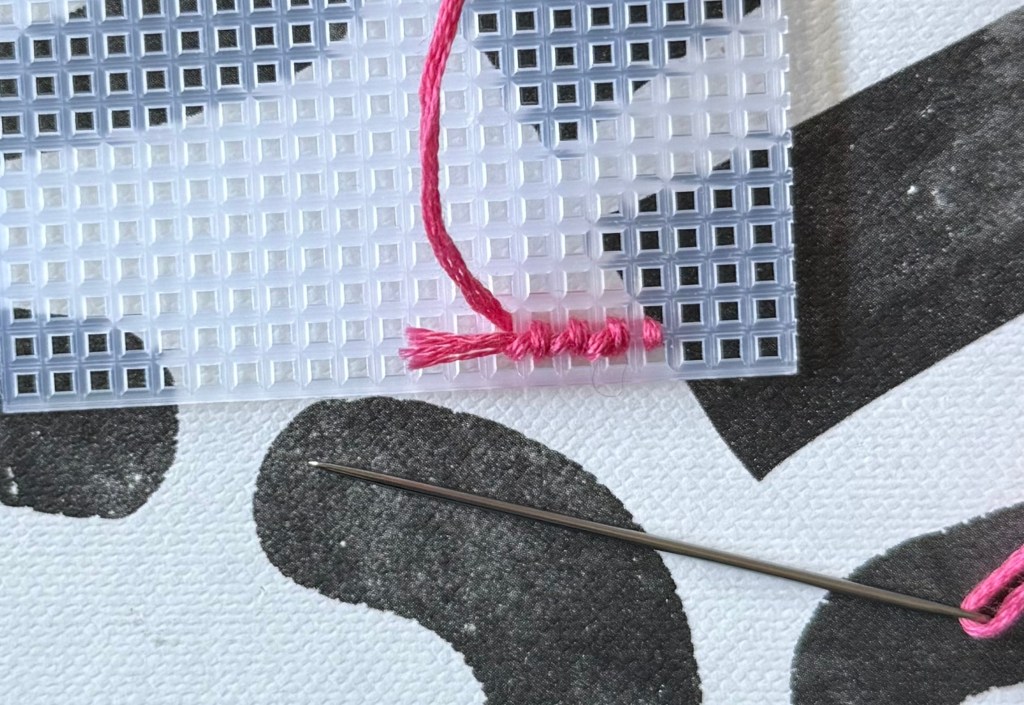
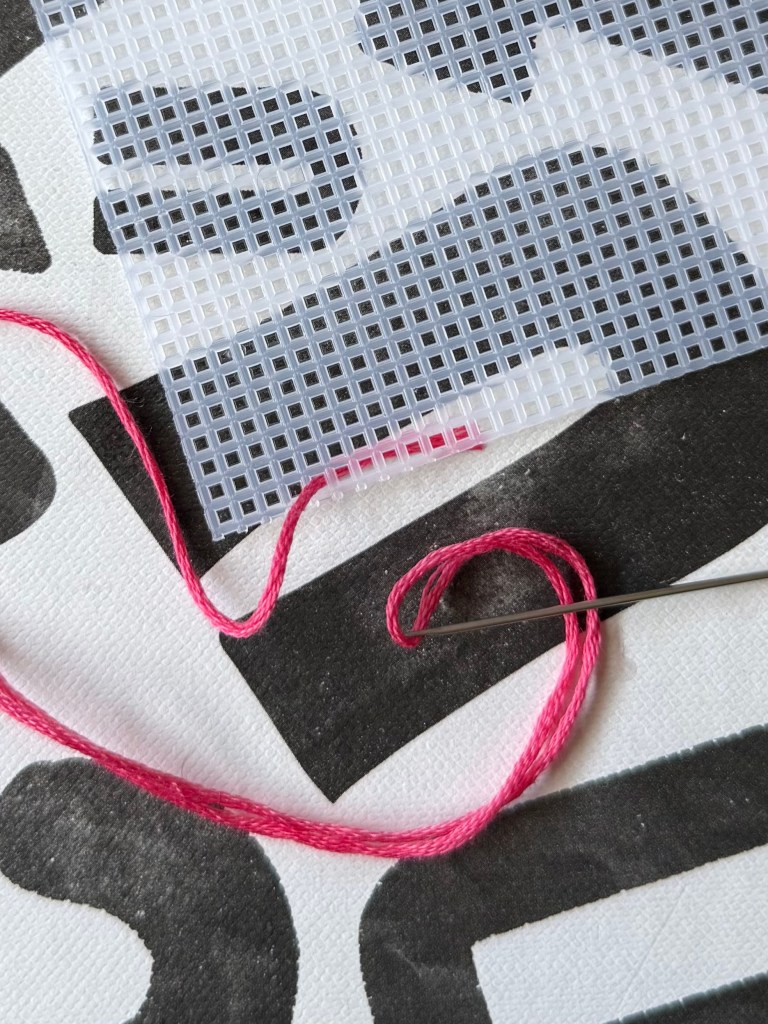
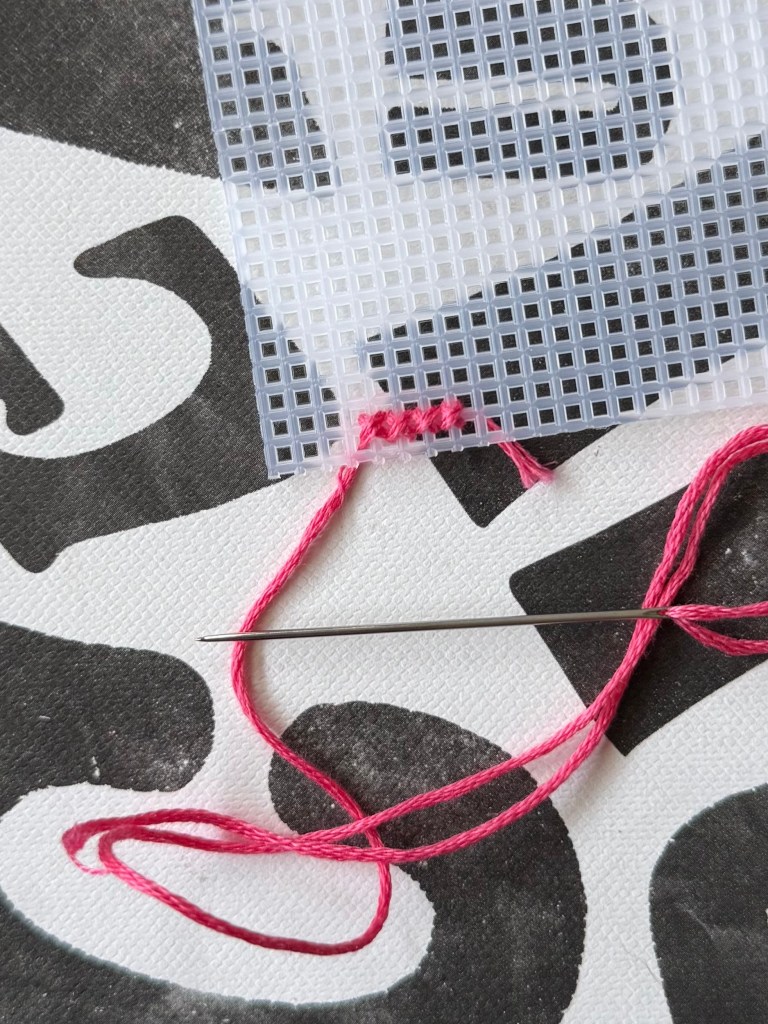
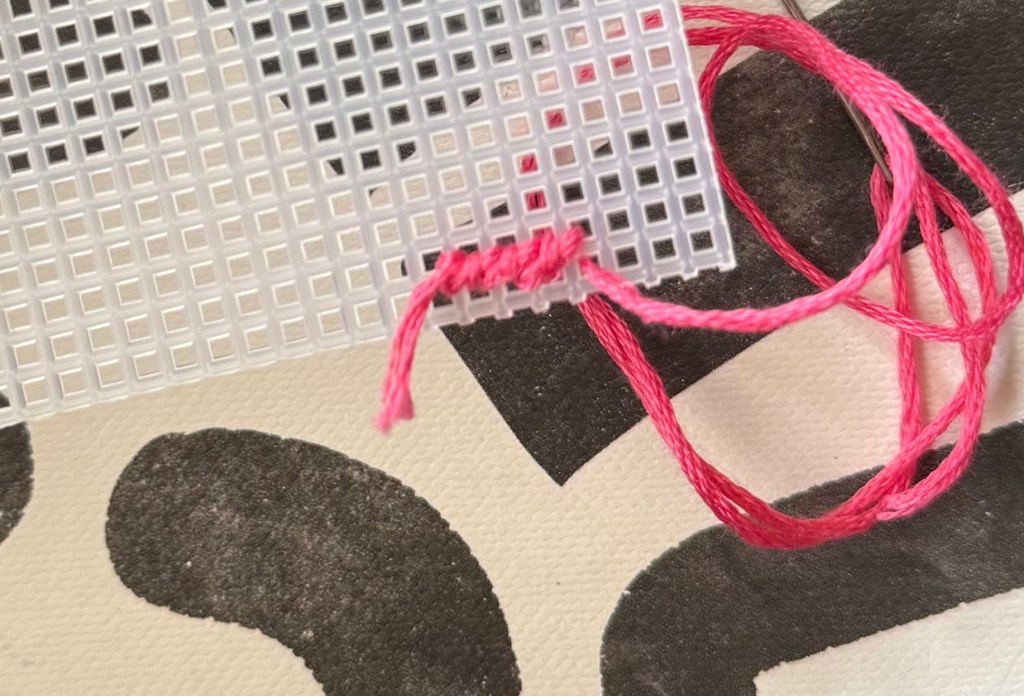
There are plenty of ways to start off your work, but I find it easiest to leave a tail of your thread on the backside of the grid, and stitch the first few x shapes to hold it down. You could do each x stitch at a time, or do a row of \ stitches before going back and doing the / stitch to finish the row. Either way will create a complete x stitch that holds the tail in place and will keep your work from loosening or coming apart. If you have a bit of extra thread after finishing your first row, that’s totally fine, because you can cut it right off.
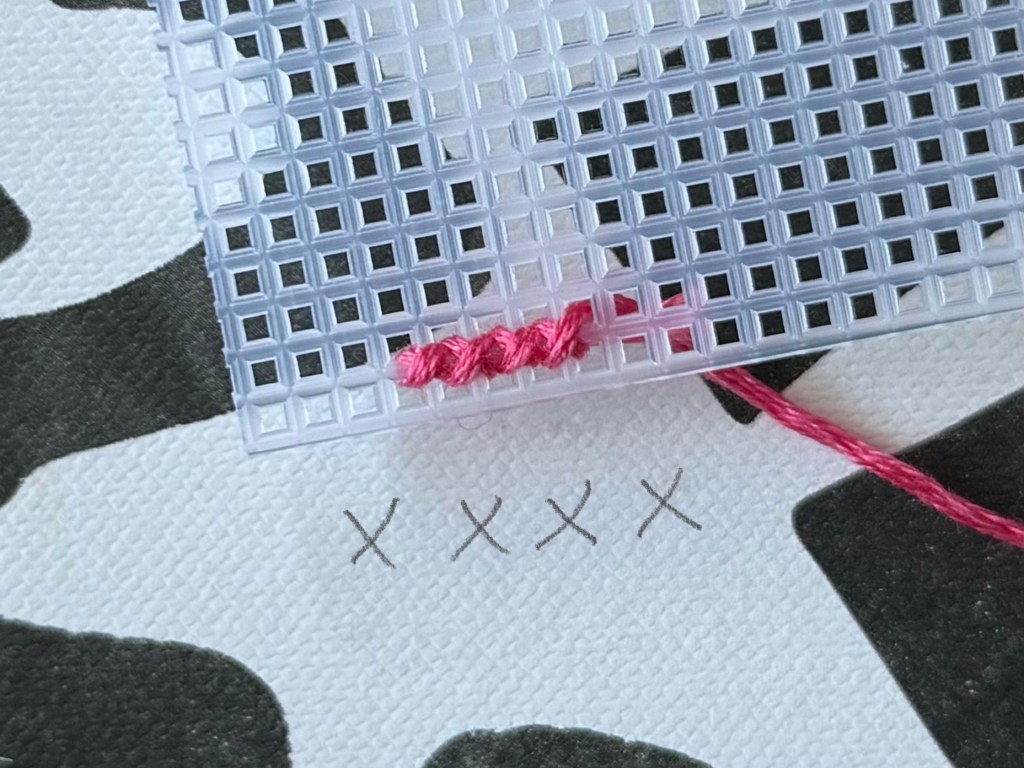
This is what it would look like if you choose to start your project by doing each x individually first:

Following these steps would hold the tail in place by making the back of your work look something like this:
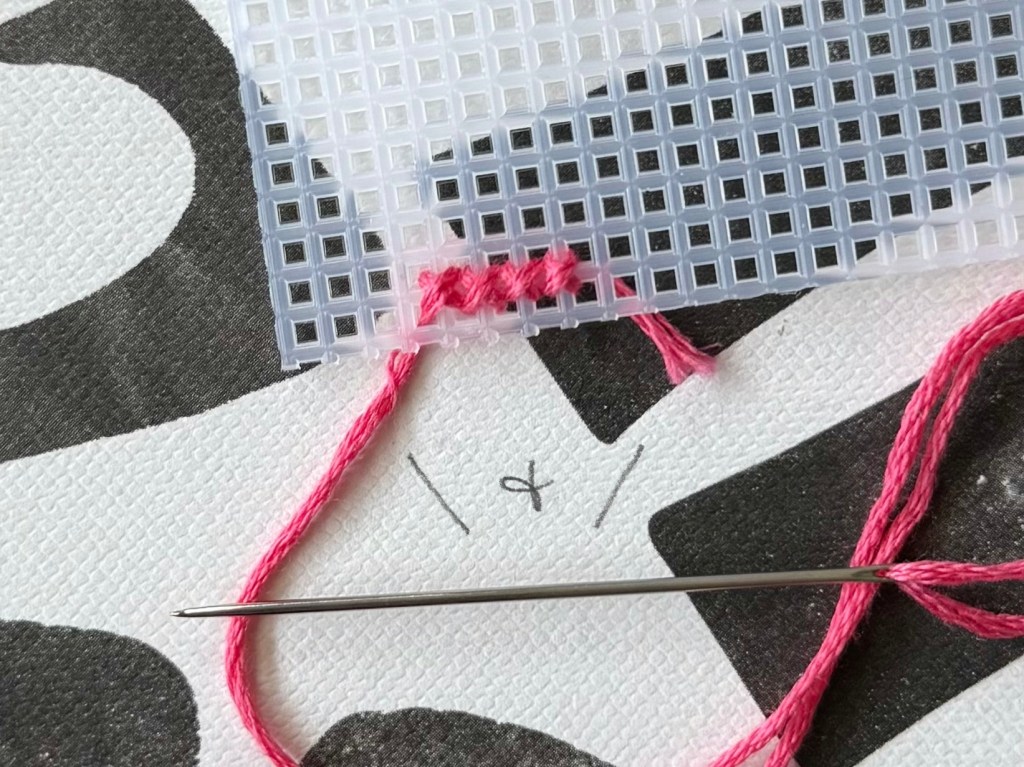
However, if you choose to do a row of \ stitches first, followed by the / stitches, it would look like like this:
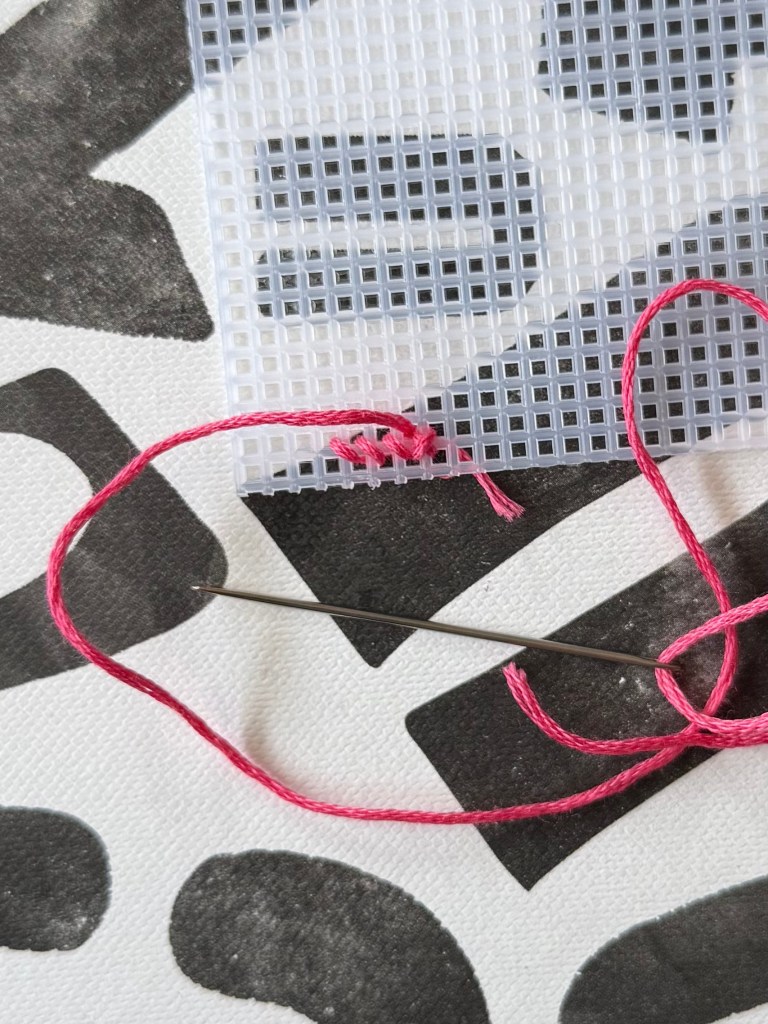
This version holds the tail in place by making the back of your work look something like this:
I recommend trying a short row both ways before starting your first project to see which way feels better for you! When I first started out, I would do each x individually, but then tried out the \ and / method, and ended up sticking with that. The only difference between the two is which side of the row your needle will end up on when you’re ready to move on to the next row.
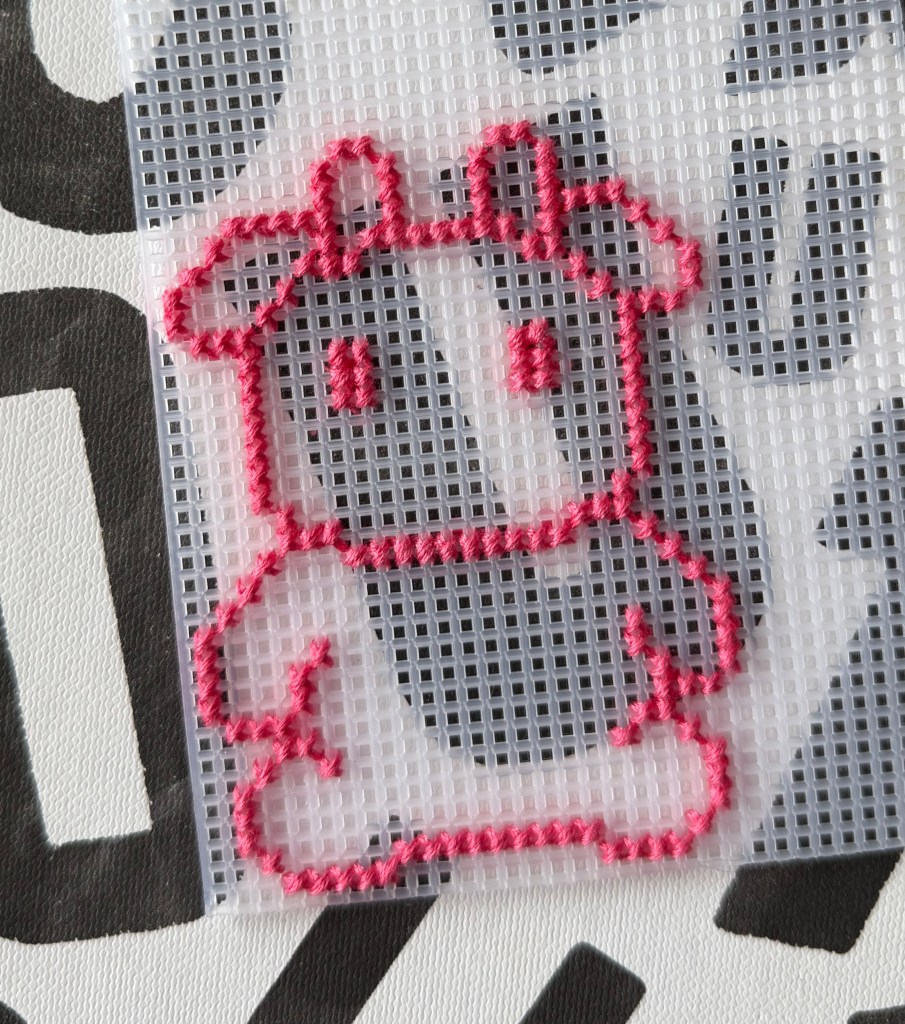
First, go ahead and use your darker pink thread to stitch the outline of the cow according to the template. Remember that the color blocks on the template are showing you the spaces in the grid where the plastic is, NOT the holes in the grid!! I will admit that confused me for a bit when I was first starting out and took me a bit to get used to.
When you run out of thread on your needle, you have two options! You can either leave that extra thread as another tail on the backside of your work to be stitched over, or you can take the needle and push it through a few completed stitches on the backside of your work to weave the thread through.
Once you’re done with the dark pink color, it should look something like this:
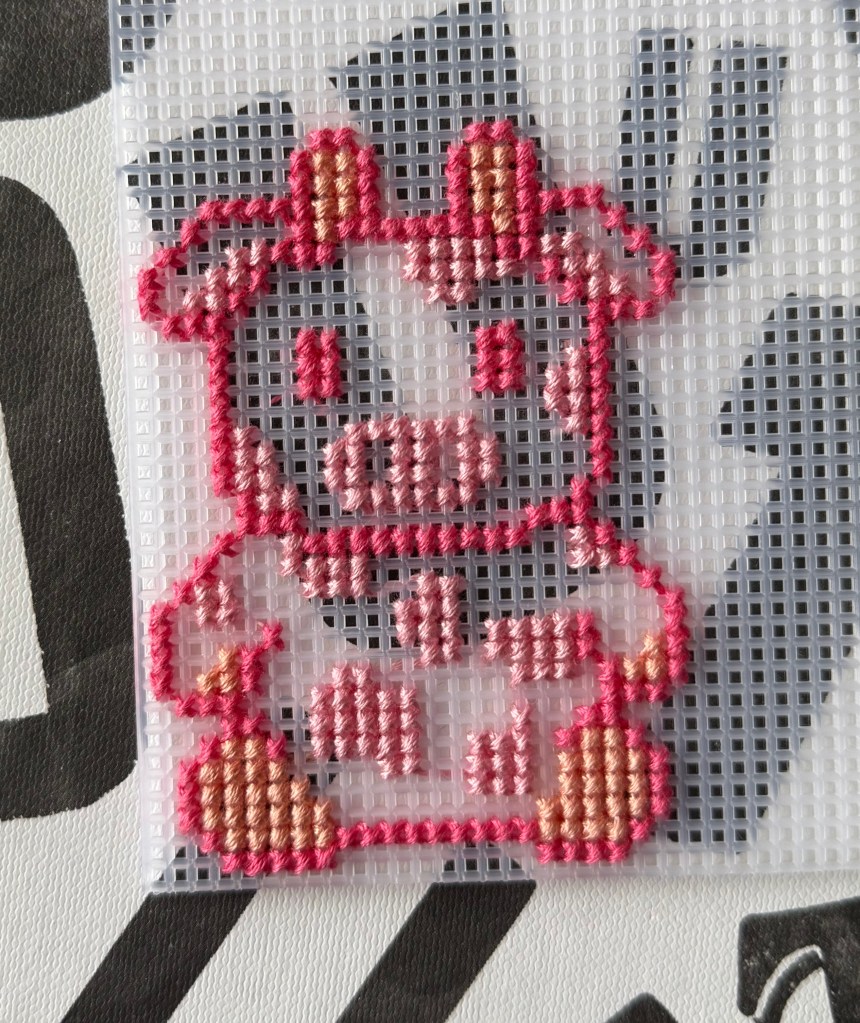
Then, take either your light pink thread or peachy thread and keep following the template! You can start each of these new color sections the same way you started your dark pink at the very beginning.
Also, keep in mind when you’re using the light pink color, you don’t necessarily need to fasten off each cow spot individually. Once you finish stitching one pink spot, you can leave a trail of thread on the backside of your work connecting it to the next pink spot. The white of the cow’s body will fill in that space later and you won’t be able to see that pink line in the final product.
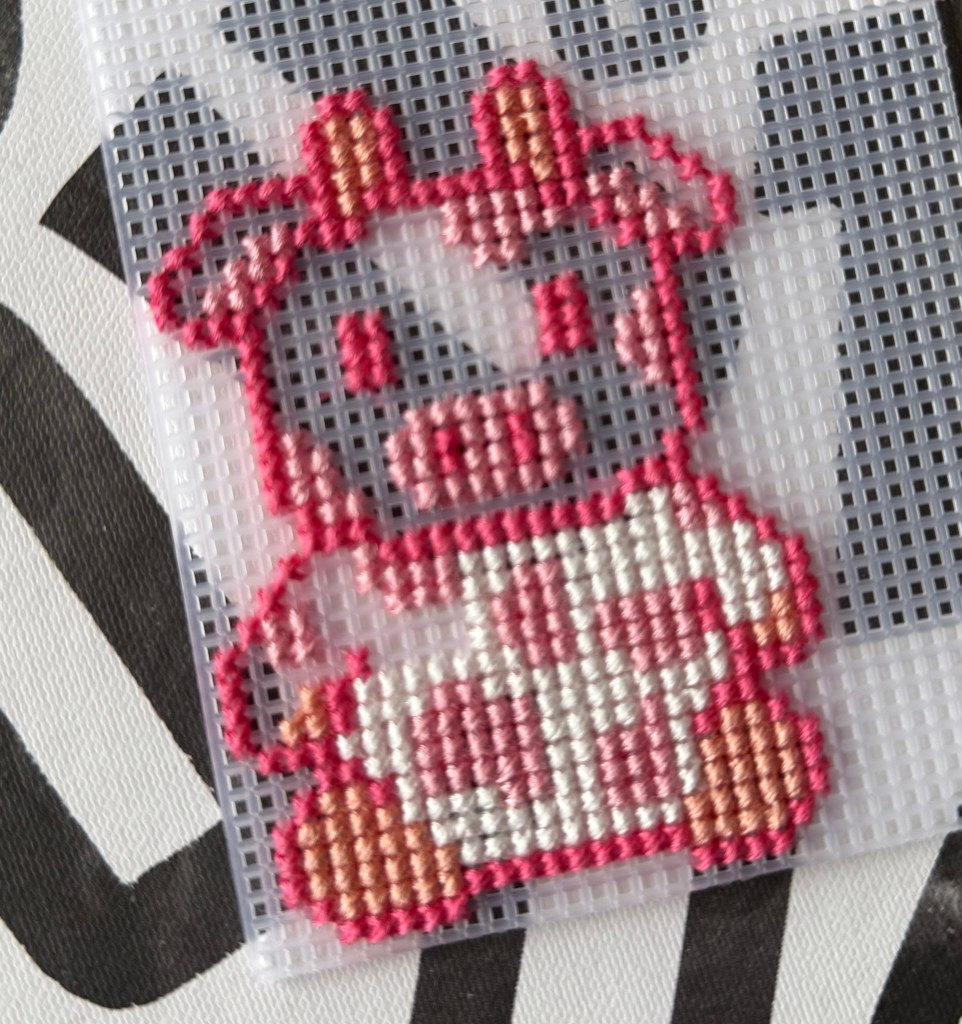
After you’ve completed the pink sections, pat yourself on the back! You’re almost there!! All that’s left is filling in the remaining spaces with the white thread.
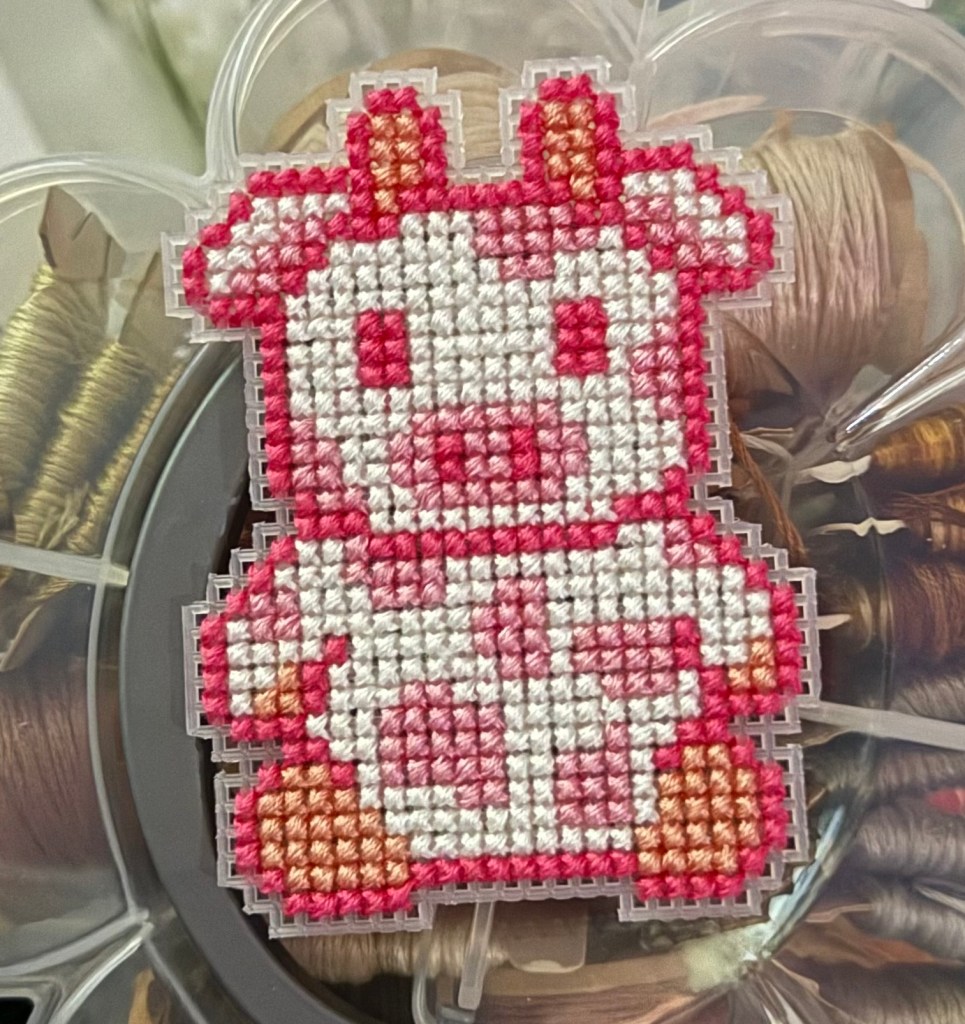
Now that the cow is fully colored in, grab your scissors and cut it out to the shape you choose. I like to cut along the outer thread for all of my projects. Just be sure to leave the rest of the plastic square on the border so your thread stays where it’s supposed to!!
At this point, you could choose to leave it as is, or add a chain to one of the plastic squares for a keychain, glue a magnet to the back, or whatever else you might have in mind for displaying your new creation.
For this specific gift, I wanted it to have a felt backing with a felt keychain hook. The way I put felt backings on my work is by cutting the felt loop for the keychain first. I used some super glue to adhere the felt loop to the cow, and then to a piece of dark pink felt. Then, glued the dark pink to the edges of the cow. Once it’s dried, I cut along the edge of the cow to fit the felt to the shape of the cow.
Of course, you could trace the cow onto the felt and have it pre-cut before you glue anything, but I find this method easier for me!
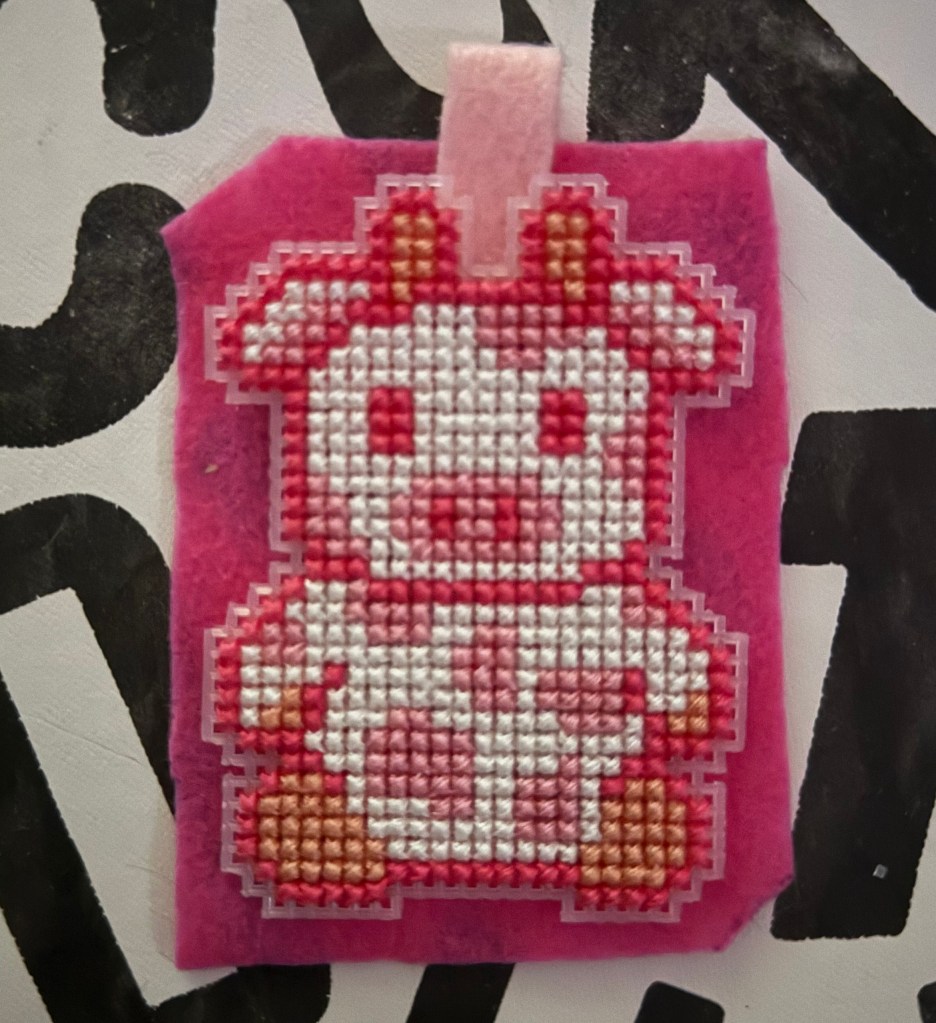
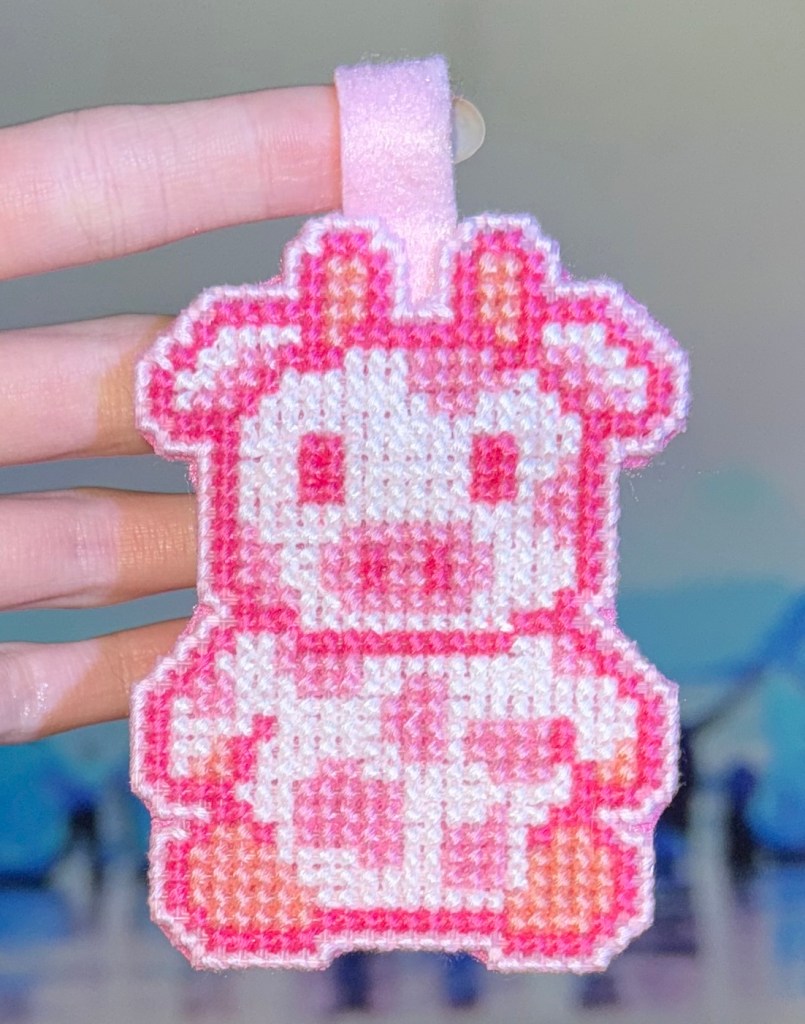
I personally like the look of the felt backing because it softens the curves of your work. Rather than having the corners of the plastic squares on the curves super visible, the felt helps to bring it together and look rounder.
Give yourself a round of applause! You just made your very own strawberry cow keychain!! Now what’s next!?
